

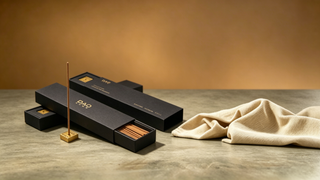
In today's pursuit of relaxation and a sense of atmosphere, more and more people are choosing to light up an incense stick. Whether for meditation, yoga, or simply to enhance the scent of a space, making your own incense sticks is a fun and practical experience. This article will guide you step-by step through how to make incense sticks. From basic raw materials to specific operations, we'll help you get started easily.
I. Core Ingredients (Based on a 100g Incense Powder Ratio)
Incense Base Powder
This serves as the structural framework for the incense sticks. It plays a decisive role in establishing the foundational aroma. You may choose to use a single type of incense powder or a blend of powders. Common natural incense base powders include sandalwood, agarwood, pine, and cypress.
Beginners are recommended to start with sandalwood or Nanmu powder. Those who prefer floral or herbal scents may incorporate ingredients such as lavender, rose, or rosemary powder. Recommended quantity: 85–90g (accounting for 85%–90% of the total mixture).

Binding Agent
This ingredient is used to bind the incense powder together and give it shape. Its function is to ensure that the incense sticks do not break easily and burn evenly. It is essential to select a natural, non-toxic binding agent. Otherwise, burning the incense will release harmful gases. Common natural binding agents include elm bark powder, Machilus wood powder, and gum arabic.
Among these, elm bark powder is the preferred choice for beginners making incense sticks. The recommended dosage is 10–15 grams, constituting 10%–15% of the total mixture. The ratio should not be too high or too low; otherwise, it will cause incense sticks to break easily or produce too much smoke and odor when burning.
Diluent (Optional)
If adding essential oils to enhance the fragrance, a diluent should be used in conjunction. A commonly used diluent is dipropylene glycol (DPG). It is safe, non-toxic, and effectively enhances the longevity of the fragrance in incense sticks. Generally, 1–2 teaspoons of diluent per 100g of incense powder is sufficient.
Essential Oils / Natural Fragrances (Optional)
These are primarily used to enhance the aroma of incense sticks. You may choose to use a single essential oil or a blend of oils. Examples include sandalwood, lavender, jasmine, and others. It is recommended to opt for natural essential oils to avoid the harsh, pungent odors often associated with synthetic fragrances.
Do not use excessive amounts; adding just 10–15 drops per 100g of incense powder is sufficient. Using too much can result in an overpowering scent and may even negatively affect the burning performance.

Water
Water is used to blend the incense powder. Pure, impurity-free water or cooled boiled water must be used. The amount used should be based on the standard that "the clay should not stick to your hands when pinched and should not fall apart when released." Generally, this amounts to 30%–35% of the total weight of the raw materials.
2. Essential Tools
Mixing Bowl
Used for mixing incense powder, binder, and water. Ceramic or glass materials are recommended. They are non-stick and easy to clean.
Stirring Stick
It is used to stir the ingredients. You may choose a wooden or ceramic stirring stick. Avoid using metal materials, as they may affect the aroma.
Incense Maker / Incense Extruder
This is an essential tool for beginners. It is used to extrude incense paste into uniform, stick-shaped forms. You may opt for a small, manual incense maker, which is simple to operate. It helps eliminate issues such as uneven stick thickness and irregular shapes often associated with manual molding.

Incense Drying Mats / Drying Racks
These are used for drying freshly formed incense sticks. It is essential to select materials that are well-ventilated and provide a flat surface. Examples include bamboo drying mats or metal drying racks.
Grinder / Mortar
If the incense powder particles are coarse, a grinder or mortar must be used to grind the powder down to a fine consistency. Generally, grinding it to a fineness of 120–150 mesh is sufficient. The finer the particles, the more evenly the incense sticks will burn, and the more gently their fragrance will be released.

Gloves, Airtight Containers
Gloves are used to prevent direct contact between your hands and the incense paste, thereby keeping your hands clean. Airtight containers are used to store the finished incense sticks, preventing the loss of fragrance and protecting them from moisture.
3. How to Make Incense Sticks: Complete Step-by-Step Guide
Once you have prepared the necessary ingredients and tools, you can begin making the incense sticks. The specific steps are as follows:
Step 1: Grinding the Incense Powder and Removing Impurities
First, place the prepared incense base powder into a grinder or mortar and grind it until it reaches a fine, powdery consistency. If using a blend, combine the various incense powders before grinding them together. Once grinding is complete, pass the incense powder through a fine-mesh sieve twice to remove any coarse particles or impurities. Place the sifted incense powder into a mixing bowl and set it aside for later use.
Step 2: Mix the Dry Ingredients Thoroughly
Pour the sifted incense base powder and binder into a mixing bowl. Using a stirring stick, mix thoroughly in a clockwise direction to ensure the binder is evenly distributed throughout the incense base powder. Ensure that absolutely no clumps remain. It is recommended to mix for at least 5 minutes.
If the mixture is not mixed evenly, it can cause incense sticks to break easily or produce excessive smoke in certain areas during combustion. If you wish to add essential oils, first mix the essential oils thoroughly with a diluent. Then, pour this mixture into the dry ingredients and mix everything together.
Step 3: Add Water and Mix the Incense Paste
Slowly add water to the dry ingredients. While adding the water, use a mixing stick to stir continuously until the dry ingredients have fully absorbed the moisture. This process yields a soft, pliable incense paste. When adding water, avoid pouring in too much at once;
The ideal consistency is one where the paste "does not stick to your hands when squeezed, yet does not crumble apart when released." Once mixed, the incense paste must be kneaded repeatedly for 10 to 15 minutes. This step ensures that the incense powder and the binder are thoroughly blended and helps to eliminate any air bubbles trapped within the paste.

Step 4: Extrusion Molding and Shaping
Place the prepared incense paste into the incense maker. Tighten the lid of the incense maker, then gently push the plunger. The incense paste will be extruded into uniform, elongated strands. Ensure that the incense sticks are of consistent thickness. Avoid making them too thick or uneven, as this can lead to incomplete combustion. Immediately place the extruded incense sticks onto an incense mat. Then, use a pair of tweezers to gently straighten them out.
Step 5: Air-Drying to Remove Moisture
Once formed, the incense sticks must be placed in a cool, well-ventilated, and dry location to air-dry. Maintain a temperature between 20°C and 25°C. Maintain a humidity level between 50% and 60%. Avoid direct sunlight and high-temperature drying methods.
During the drying period, turn the incense sticks over once daily to prevent the undersides from absorbing moisture and developing mold. The air-drying process typically takes 7 to 10 days. Adjust the drying time as needed based on the ambient humidity until the incense sticks are completely dry. They are ready when they feel dry to the touch and are no longer brittle or prone to breaking easily.
Step 6: Aging and Storage to Enhance Aroma
Once the incense sticks are completely dry, it is recommended to place them in an airtight container to age for 1 to 3 months. During the aging process, the various aromatic components within the incense naturally meld together. As a result, the fragrance of the incense sticks becomes more mellow and enduring.
During the aging process, open the sealed container for ventilation for 1 hour every 15 days to prevent incense sticks from becoming moldy. Once the aging process is complete, the incense sticks are ready for use, or they may continue to be stored in an airtight container. With proper storage, the fragrance can be preserved for 6 to 12 months.
4. Tips for Making Incense Sticks
1. Do Not Arbitrarily Adjust the Binder Ratio
Using too much binder will overpower the natural fragrance of the incense base itself. It results in excessive smoke and a choking odor when burned. Using too little binder causes the incense sticks to break easily. Simply add the binder at a ratio of 10% to 15%.
2. Precise Control of Paste Moisture
If the paste is too wet, it is prone to deformation after extrusion and is difficult to dry. If the paste is too dry, it is prone to cracking during extrusion. Ideally, add small amounts of water incrementally while repeatedly kneading the mixture until the optimal moisture level is achieved.
3. Avoid Direct Sunlight or High-Temperature Drying
Once formed, the incense sticks must be dried in the shade. Exposure to direct sunlight can cause the incense sticks to crack. High-temperature drying can destroy the fragrance of the incense ingredients and may even generate harmful substances.
Conclusion
Based on the information above, we trust you have now grasped the methods and fundamental principles behind making incense sticks. If you are simply looking to try your hand at DIY, you can start with simple recipes. However, if you're looking for a more stable and refined fragrance, choosing incense sticks from the professional brand Dao Incense is a more convenient option.
Dao incense's incense stick blends traditional Eastern incense culture with modern craftsmanship. We utilize natural botanical ingredients and remain committed to a handcrafted production process. While emphasizing the balance between humanity and nature, we also prioritize environmental protection and sustainable sourcing.
Whether you make your own or choose branded incense sticks, incorporating fragrance into your life is a simple and effective way to relax.